TP-Link Router Login
TP-Link WiFi router login is a reliable, straightforward process that lets you access and manage all your network settings from one place. By signing in to the TP-Link router’s admin panel, you gain complete control over your WiFi name and password, parental controls, wireless security protocols, device management, and overall network performance.
Understanding how to log in correctly is essential for keeping your internet connection secure and running smoothly. Whether you’re using a TP-Link router at home, in a small office, or for a business setup, accessing the admin interface ensures better network control and customization.
This guide walks you through the complete TP-Link login process, including default IPs, usernames, and passwords. You’ll also learn about common login issues, their solutions, and the correct steps to configure your router for a more stable, safe, and optimized WiFi experience.
Login Information of TP-Link Default
To successfully access the TP-Link admin page, you must know the correct default login details. These include the router’s IP address and the factory-set username and password.
Default IP Addresses Used by TP-Link Routers
Most TP-Link routers use one of the following IP addresses for login:
- 192.168.0.1
- 192.168.1.1
- 192.168.0.254
- tplinkwifi.net
- tplinklogin.net
If one IP doesn’t load the login page, try the next option.
Default Username and Password for TP-Link Routers
Most TP-Link models come with the following default credentials:
- Username: admin
- Password: admin
If you have changed these details previously, enter your updated login information.
Where to Locate Your TP-Link Router’s Default Credentials
You can find your router’s default login details in the following places:
- On the label on the back/bottom of the router
- In the user manual
- Inside the original router packaging
- On TP-Link’s support website
Default Login Reference for Popular TP-Link Series
TP-Link Series
Default IP
Username
Password
Standard TP-Link Models
admin
admin
Archer Series (A/C/AX Models)
admin
admin
Deco Mesh Systems
tplinkwifi.net
admin
admin
Older TP-Link Models
admin
admin
If the default details do not work, your router may have saved custom credentials or may need a factory reset.
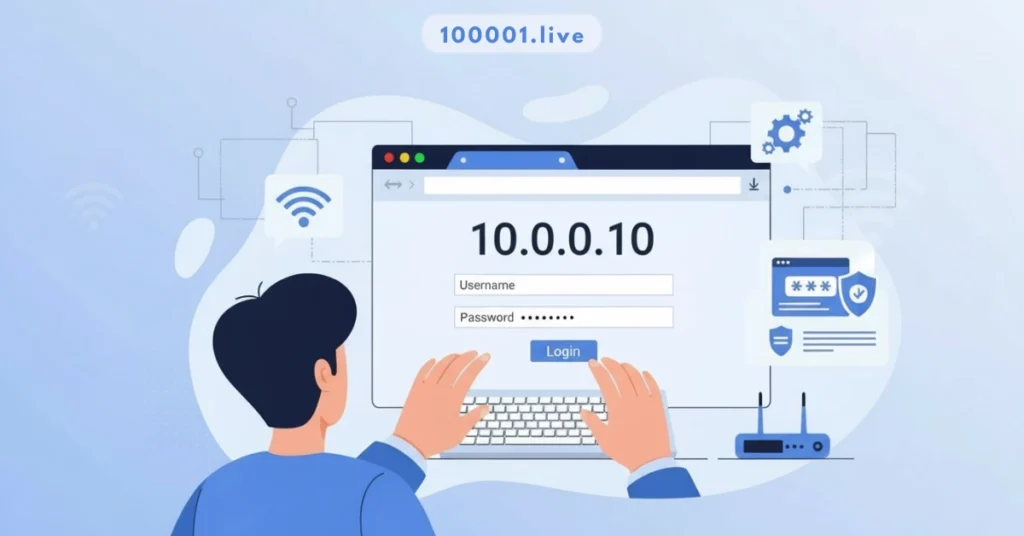
Before adjusting your TP-Link settings, ensure you can access the 10.0.0.0.1 piso wifi portal login if you are using a vending machine setup.
You can find additional configuration steps for other manufacturers in our main router brands section.
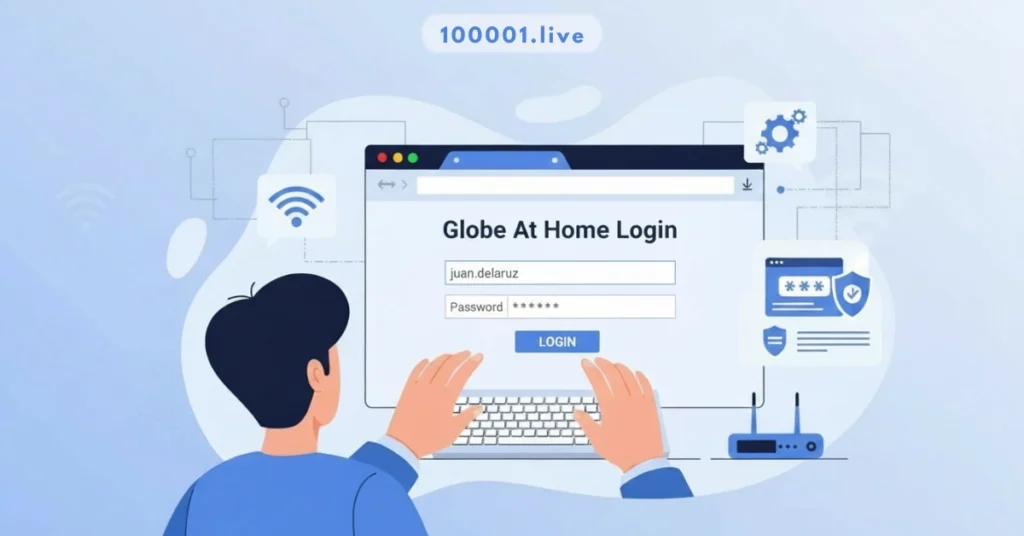
This process is very similar to the steps required for the Globe at Home login on local networks.
How to Access the TP-Link Login Page
Logging in to your TP-Link router is essential for managing your WiFi settings, improving network security, and performing advanced configurations. Follow this guide to access the login interface without errors.
Requirements Before Starting the TP-Link Login Process
Before trying to log in, make sure these conditions are met:
Ensure Your Device Is Connected to the TP-Link Network
- Connect via WiFi
- OR connect using a wired Ethernet cable.
If you’re on mobile data or on another WiFi network, the login page will not open.
Use a Wired Connection for First-Time Setup
An Ethernet cable provides a stable and uninterrupted connection when configuring the router.
erify Router Power and LED Indicators
Check that:
- The power LED is ON
- WLAN/WiFi LED is active
- LAN LED is blinking (for wired connection)
- WAN/Internet LED is functioning properly
These indicators confirm your router is working correctly.
Visit 10.0.0.1 to set up your Wi-Fi and optimize your router settings.
Step-by-Step Guide to Logging in to Your TP-Link Router
Follow these steps to open the TP-Link admin panel:
Step 1: Connect to the TP-Link Router
Connect your computer, smartphone, or tablet to your TP-Link router via WiFi or Ethernet.
Step 2: Open a Web Browser
Use any browser, such as:
- Google Chrome
- Safari
- Firefox
- Microsoft Edge
Step 3: Enter the TP-Link Login IP Address or URL
Type any of the following into the browser’s address bar:
Press Enter to load the login page.
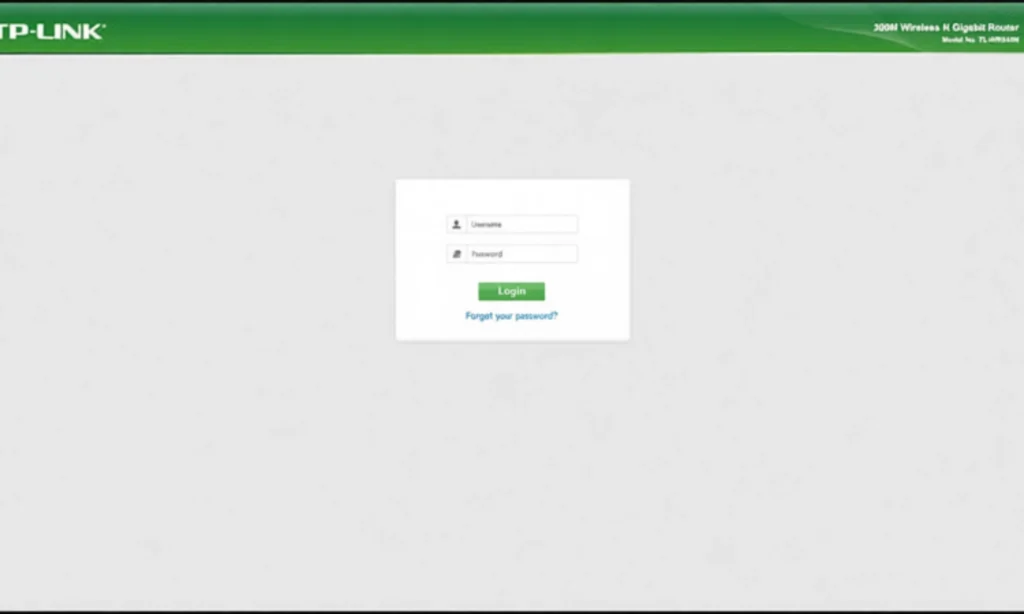
Step 4: Enter the Router Login Credentials
You will see the username and password fields. Enter:
- admin (Username)
- admin (Password)
If you changed these details earlier, use the updated credentials.
Step 5: Access the TP-Link Admin Dashboard
Once logged in, you can:
- Change WiFi name & password
- Update wireless security
- Configure parental controls
- Manage connected devices
- Set up the guest network.
- Update firmware
- Adjust advanced settings like quality of service, IP reservation, and port forwarding.
Logging In Using TP-Link Cloud Account (Remote Management)
Modern TP-Link routers! Especially Archer AX models and Deco Mesh devices—allow cloud-based login for easier and remote network management.
When to Use TP-Link Cloud Login
Cloud login is helpful when:
- Managing your router from outside your home
- Using the TP-Link Tether App
- Controlling Deco Mesh networks through the Deco App
- Monitoring connected devices remotely
Features Available Through TP-Link Cloud Login
With a TP-Link ID, you can:
- Change WiFi settings remotely
- View active devices anytime.
- Turn WiFi on or off on the go.
- Apply parental control filters.
- Perform cloud-based firmware update.s
- Receive security alerts and notifications.s
Advantages for Archer AX & Deco Models
Cloud connectivity enhances:
- Mesh performance optimization
- Easy remote troubleshooting
- Automated firmware updates
- Centralized control for multiple TP-Link devices
Change TP-Link Login Username & Password to Enhance Admin Panel security.y
It is essential to secure your TP-Link router by changing the default admin username and password. Anyone connected to your WiFi can access your router settings if you keep the default login details unchanged. Updating these credentials strengthens your network security and protects your settings from unauthorized access.
Why Changing the Default Router Login is Important
Leaving the default login credentials unchanged can make your router vulnerable. Here’s why you should update them:
- Prevents unauthorized access to router settings
- Stops others from changing WiFi passwords
- Protects parental controls and device restrictions
- Keeps hackers from accessing your network configuration
- Improves the overall security of your WiFi setup
Updating the admin login ensures that only you can manage your router.
Steps to Change TP-Link Login Username
Follow these steps to update your TP-Link admin username:
- Connect your device to the TP-Link Wi-Fi or LAN.
- Open any browser (Chrome, Safari, Firefox, Edge).
- Enter 192.168.0.1, 192.168.1.1, or tplinkwifi.net in the address bar.
- Log in using your current username and password.
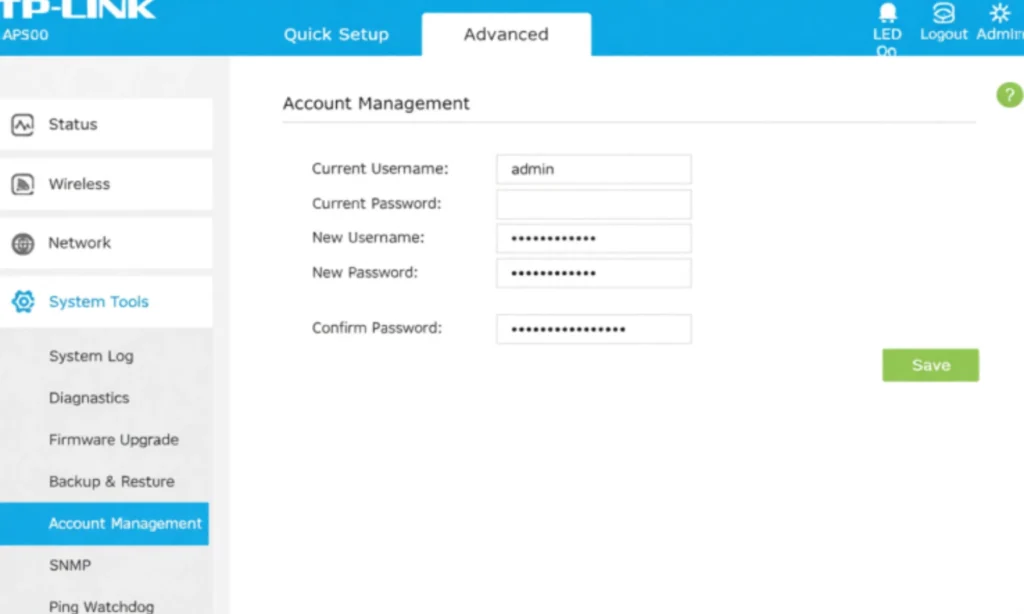
- Go to System Tools or System Administration (depending on your model).
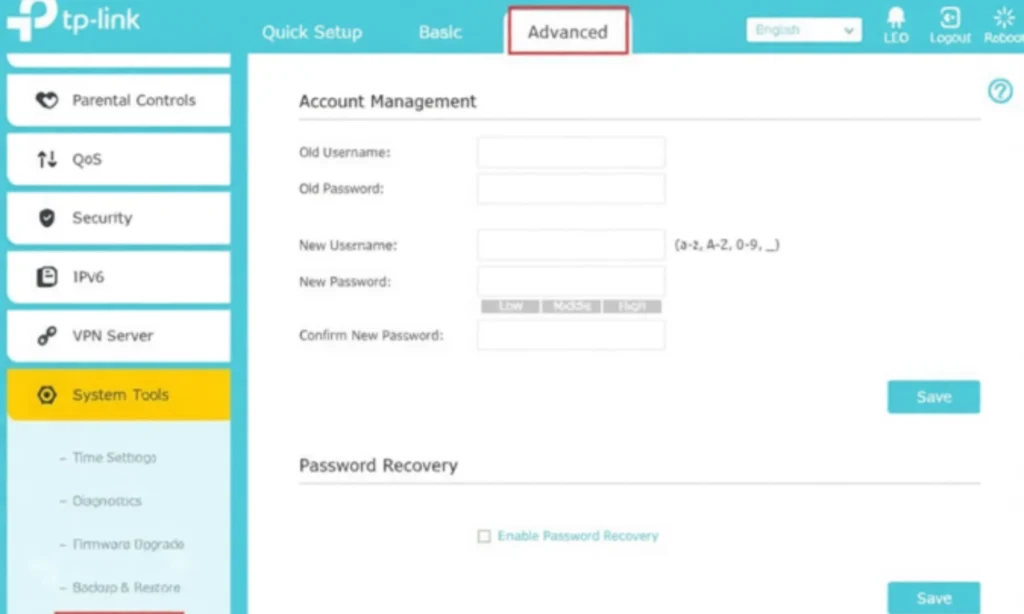
- Select Admin Username or Account Management.
- Enter your new username.
- Click Save or Apply.
Your router may ask you to log in again using the new username.
Steps to Change TP-Link Login Password
To update your router’s admin login password, follow these steps:
- Log in to the TP-Link admin panel.
- Navigate to System Tools → Password or Administration.
- Enter your old password.
- Type a strong new password in the New Password field.
- Re-enter the new password for confirmation.
- Click Save or Apply.
Your login session will refresh, and you will need to sign in again with your new password.
Strong Password Requirements
To create a secure and reliable password:
- Minimum 8–16 characters
- Use uppercase + lowercase letters.
- Add numbers and special symbols.
- Avoid common words or personal names.
- Do not reuse your WiFi password for admin login.
Example of a strong password:
Ahs@n2024#Secure
How to Apply & Reboot
After updating the username or password:
- Click Save/Apply
- The router may reboot automatically.
- If not, restart manually to apply the changes fully.
Once rebooted, use your new admin credentials to log in.
TP-Link WiFi Network Setup
The TP-Link admin dashboard lets you fully customize your WiFi — from changing your password to optimizing dual-band networks. Proper setup ensures better speed, stability, and security.
How to Change the TP-Link WiFi Password
Log in to the TP-Link admin panel.
Go to Wireless or WiFi Settings.
Select Wireless security.
Look for the Wireless Password or WPA-PSK/WPA2-PSK section.
Enter your new WiFi password.
Click Save.
Reboot the router if prompted.
How to Change the TP-Link WiFi Name (SSID)
Open the TP-Link admin interface.
Go to Wireless Settings.
Find the SSID or Network Name field.
Type your new WiFi name.
Save the changes and restart your router.
Dual-Band & Tri-Band WiFi Setup (2.4 GHz, 5 GHz & Mesh)
Modern TP-Link routers provide multiple frequency bands for better coverage and speed.
2.4 GHz vs 5 GHz
- 2.4 GHz: Greater range, slower speeds
- 5 GHz: Faster speeds, shorter range
You can configure both bands separately.
Separate vs Combined SSID
- Separate SSIDs:
- Example: Home_2.4G and Home_5G
- Users can manually select the faster or more stable band.
- Example: Home_2.4G and Home_5G
- Combined SSID (Smart Connect):
The router automatically chooses the best band.- Recommended for simplicity and automation
- Recommended for simplicity and automation
Mesh Network Naming (TP-Link Deco Systems)
Deco mesh routers typically use a single SSID for seamless roaming across all mesh nodes.
Benefits:
- No manual switching
- Better coverage
- Stronger, more stable WiFi across the house
TP-Link Login Methods on Different Devices
You can access the TP-Link router login page using any device — Windows, macOS, Android, or iPhone. The steps are similar, with slight variations depending on the device.
Log in on Windows PC/Laptop
- Connect to the TP-Link WiFi or LAN.
- Open Chrome, Edge, or Firefox.
- Enter 192.168.0.1, 192.168.1.1, or tplinkwifi.net.
- Enter your login credentials.
Windows Tips
- Use Ctrl + Shift + N to open an incognito window if the page doesn’t load
- Clear the browser cache if the login page keeps showing errors.
- Use ipconfig (Command Prompt) to check the correct default gateway.
Log in on macOS (MacBook/iMac)
- Connect to the TP-Link WiFi network.
- Open Safari or Chrome.
- Type the router login IP or URL.
- Enter the admin username and password.
macOS Tips
- Clear Safari history/cache if the login page fails
- Use Option + the WiFi icon to see your router’s IP address quickly.
Log in on Android Devices
- Connect your phone to the TP-Link WiFi network.
- Open Chrome or any browser.
- Type 192.168.0.1 or tplinkwifi.net.
- Enter login credentials to access the router.
Android Tips
- Use incognito Mode if the page doesn’t load
- Turn off mobile data for accurate loading.
- Clear browser cookies if redirected incorrectly
Log in on iPhone/iPad.
- Connect to the TP-Link WiFi network.
- Open Safari or Chrome.
- Enter the router IP or login URL.
- Sign in with your admin details.
iPhone/iPad Tips
- Turn off VPN if enabled.
- Clear Safari history/settings
- Use the URL bar, not the search bar
TP-Link Login Using the Tether App (Easy Mobile Management)
The TP-Link Tether App provides a quick and convenient way to manage your TP-Link router directly from your smartphone. Instead of using a browser and entering the router’s IP, you can easily access all essential settings with just a few taps.
Overview of TP-Link Tether App
The Tether App is designed to simplify router management for all users. It offers a clean interface and lets you control your Wi-Fi network from anywhere, as long as you are connected to the router or logged in to TP-Link Cloud.
Key Features of the App
- Easy router setup
- WiFi network customization
- Device monitoring
- Security and parental controls
- Firmware updates
- Guest network management
- Remote access via TP-Link Cloud
- Piso WiFi monitoring (for supported TP-Link models)
Compatible TP-Link Models
The TP-Link Tether App works with:
- Archer Series Routers
- TP-Link WiFi 6 (AX) Routers
- TP-Link WR & WDR Series
- Range Extenders (RE Series)
- TP-Link Mesh & Deco (via Deco App)
- TP-Link Piso WiFi Supported Modems
How to Log in to Your Router Using the Tether App
Follow the steps below:
- Download the TP-Link Tether App from the Google Play Store or Apple App Store.
- Connect your phone to the TP-Link WiFi network.
- Open the app and sign in with your TP-Link ID.
- Select your router from the list of detected devices.
- Enter the router’s admin password when prompted.
- You will now enter the router’s control panel.
What You Can Control Using the Tether App
WiFi Password
- Change your WiFi password instantly
- Update network name (SSID)
- Manage dual-band WiFi
User Blocking
- Block suspicious or unwanted devices.
- View connected devices in real time.
Parental Controls
- Set browsing schedules
- Restrict certain websites
- Pause the internet for specific users.
Quality of Service
- Allocate bandwidth to priority devices.
- Improve gaming or streaming performance.
Firmware Updates
- Update router firmware with one tap
- Improve speed, stability, and security.
Guest Network
- Create or turn off the guest network.
- Set temporary access for visitors.
Advanced Router Settings After Login
Once you access the TP-Link admin panel, you can configure advanced features for improved performance, security, and network control.
Parental Controls Setup
Parental controls help you manage internet access for children or specific users.
You can:
- Block unsafe or harmful websites
- Set time limits for internet usage.
- Pause the internet for specific devices.
- Create customized access rules.
These settings help create a safer browsing experience for your family.
Guest Network Configuration
A guest network allows visitors to use your WiFi without accessing your main devices.
You can:
- Turn guest WiFi on or off
- Set a separate password.
- Limit guest bandwidth
- Restrict guest access to your leading network.
This protects your privacy and keeps your primary network secure.
Access Control & MAC Filtering
Access Control helps you decide which devices can connect to your WiFi.
You can:
- Block or allow specific devices
- Add MAC addresses manually.
- Restrict unknown devices
- Create allowlists or blocklists.
Ideal for preventing unauthorized access.
Firmware Update (Manual & Auto)
To keep your router secure and fast, update its firmware regularly.
Manual Update:
- Download firmware from TP-Link’s official site.
- Open the admin panel → System Tools → Firmware Upgrade.
- Upload the firmware file and update.
Automatic Update:
- Many new models support one-click updates
- You can also enable auto-updates via the Tether App.
Firmware updates improve speed, security, and network performance.
Port Forwarding & DMZ
These settings are essential for gaming, server hosting, or remote access.
Port Forwarding
- Open specific ports for apps or games
- Improve connectivity for CCTV, servers, and gaming consoles.
DMZ (Demilitarized Zone)
- Expose one device to the internet for unrestricted access
- Only use for trusted and secure devices.
Bandwidth Control/quality of service
Quality of Service (quality of service) helps you prioritize bandwidth for essential tasks.
You can:
- Allocate more speed to gaming or streaming
- Reduce lag and buffering.
- Prioritize devices such as PCs, mobile devices, or smart TVs.
What happens when the TP-Link Login is Not Working?
If you are unable to access the TP-Link login page, it may be due to an incorrect IP address, wrong credentials, or network issues. Below are the most common problems and their solutions.
Wrong IP Address
If you enter the wrong IP, the login page will not load.
How to Find the Correct Gateway IP
On Windows:
- Press Win + R → type cmd
- Type ipconfig
- Look for Default Gateway — that is your router login IP.
On Mac:
- Go to System Preferences → Network
- Select your WiFi network.
- Click Advanced → TCP/IP
- You will see the Router IP address.
Device Not Connected to Router
- Ensure your device is connected to TP-Link WiFi.
- Turn off mobile data.
- For Ethernet, check if the LAN LED is blinking.
Incorrect Username or Password
- Double-check your credentials
- If forgotten, reset your router to factory settings.
Browser Cache Issues
- Clear browser cache and cookies
- Use incognito/private Mode.
- Try another browser
IP Conflict in the Network
Two devices using the same IP can cause login errors.
Solutions:
- Restart the router and device
- Assign a static IP manually.
Router Firmware Bugs
Outdated firmware can affect login.
Fix:
- Update firmware via Tether App or admin panel
Router Not Responding
Power Cycle
- Turn off the router
- Wait 10 seconds
- Turn it back on
Soft Reset
- Use the reset button (press for 5 seconds)
The router will restart without deleting all settings.
Firewall or Antivirus Blocking
Temporarily turn off the firewall or antivirus.
Try reaccessing the IP.
Faulty LAN Cable or Port
- Replace the Ethernet cable.
- Try another LAN port.
Forgot Custom Router IP
Find It Using the Device Tools:
Windows (CMD):
Type ipconfig, check Default Gateway
Mac (Terminal):
Type ifconfig, find the Router IP
Factory Resetting TP-Link Router
Resetting your router restores it to factory default settings. This is helpful when you forget the login password or face significant configuration errors.
When to Reset
You should reset your router if:
- You forgot your login credentials
- The router is unresponsive.
- Firmware issues persist
- IP conflicts cannot be resolved.
- Wrong settings break the connection.
Soft Reset vs Hard Reset
Soft Reset
- Press the reset button for 5 seconds
- Router restarts without deleting custom settings.
Hard Reset (Factory Reset)
- Restores all settings to default
- Deletes custom WiFi name, password, and admin login
- Requires reconfiguration afterward
How to Use the Reset Button
10-Second Reset (Standard TP-Link Reset)
- Turn on your router
- Press and hold the reset button for 10 seconds
- Lights will flash — router will reboot
- Default settings will be restored.
30-30-30 Reset Method (For Older Models Only)
- Hold reset for 30 seconds
- Turn off the router (continue holding) for 30 seconds.
- Turn on the router (still holding) for 30 seconds.
Reconfiguration After Reset
After resetting, you must:
- Reconnect using the default SSID
- Log in using admin/admin.
- Set a new WiFi name and password.
- Update admin credentials
- Configure security settings
- Re-enable parental controls and quality of service.
- Update firmware
TP-Link security Tips for a Safe and Protected Network
Securing your TP-Link router is essential to prevent unauthorized access and maintain a stable, private internet connection. Below are the recommended security practices every TP-Link user should follow.
Change Login Password Regularly
Update your TP-Link admin login password frequently to prevent unauthorized access. Avoid using easy passwords like “123456” or your name. A strong password helps protect your router’s settings and prevents others from taking control of your network.
Turn On WPA3/WPA2 Encryption
Always enable WPA2-PSK or WPA3 encryption in the Wireless security settings.
This ensures:
- Better protection from hackers
- Secure data transmission
- Stronger WiFi authentication
Avoid using WEP encryption—it’s outdated and unsafe.
Disable WPS
WPS is a quick-connect feature, but it is considered insecure today. Disabling WPS helps prevent brute-force attacks and keeps your router safer from intrusion attempts.
Hide SSID When Needed
If you want an extra layer of privacy:
- Hide your WiFi network name (SSID)
- Only users who manually enter your SSID can connect.
This reduces the chance of strangers noticing your network.
Block Unknown Devices
Use Access Control or MAC Filtering to:
- Block unknown or suspicious devices
- Kick out unrecognized connections.
- Prevent neighbors or strangers from using your WiFi.
You can view and manage connected devices from the router dashboard or the Tether App.
Schedule WiFi ON/OFF
TP-Link routers support wireless scheduling, allowing you to:
- Automatically turn WiFi off at night
- Manage children’s internet usage.
- Save power when the network isn’t needed.
This improves network safety and reduces unwanted access.
Keep Firmware Updated
Regular firmware updates:
- Fix bugs
- Improve router performance
- Strengthen network security
- Add new features
Check for updates via the TP-Link admin panel or Tether App.
Frequently Asked Questions
How do I log in to my TP-Link router?
Connect to your TP-Link WiFi → open a browser → type 192.168.0.1, 192.168.1.1, or tplinkwifi.net → enter the username and password → access the admin panel.
What is the default username and password for TP-Link?
Most TP-Link routers use:
- Username: admin
- Password: admin
What IP address should I use for the TP-Link login?
Use any of these:
- 192.168.0.1
- 192.168.1.1
- tplinkwifi.net
What should I do if the login page is not open?
Try these:
- Make sure you’re connected to the TP-Link network
- Use another browser
- Clear browser cache
- Try a different IP address.
- Turn off mobile data or VPN.
How do I change my TP-Link WiFi password?
Log in → go to Wireless Settings → select Wireless security → enter a new WiFi password → save → reboot if needed.