192.168.0.1 Admin Login
The IP address 192.168.0.1 is one of the most widely used default gateway addresses for home routers and modems. If you’re using brands like TP-Link, D-Link, NETGEAR, Tenda, and some others, this is the address you need to open in your browser to access the router admin panel.
This guide will walk you through everything step by step, from what 192.168.0.1 actually is to how to log in and secure your router correctly.
What Is 192.168.0.1?
192.168.0.1 is a private IPv4 address that is commonly used as the default gateway (local access address) for your router.
- It’s the “door” between your local network (home/office) and the wider internet.
- When you type http://192.168.0.1 into your browser while connected to your router, you’re not going to some website on the internet! You’re opening the router’s internal configuration page.
Relevant IP Addresses:
Ensure your connection is active via the 10.0.0.0.1 gateway before attempting to log in.
View more default gateways in our router IP address list.
If this fails, your router might be set to the standard 192.168.1.1 instead.
Some specific brands use 192.168.10.1 as their primary admin IP.
How to Log In to 192.168.0.1 (Step-by-Step)
Here’s the exact, user-friendly process to access your router’s admin panel via 192.168.0.1.
Step 1: Connect to the Router's Network
Make sure your device is connected to the router:
- Via Wi-Fi, or
- Via an Ethernet cable plugged into the LAN port.
If you’re connected to mobile data, another Wi-Fi network, or a VPN, you won’t be able to reach 192.168.0.1 for your router.
Step 2: Open a Web Browser
You can use any mainstream browser, such as:
- Google Chrome
- Mozilla Firefox
- Microsoft Edge
- Safari
- Opera
Just make sure it’s up to date, as ancient versions can sometimes cause compatibility issues with router web interfaces.
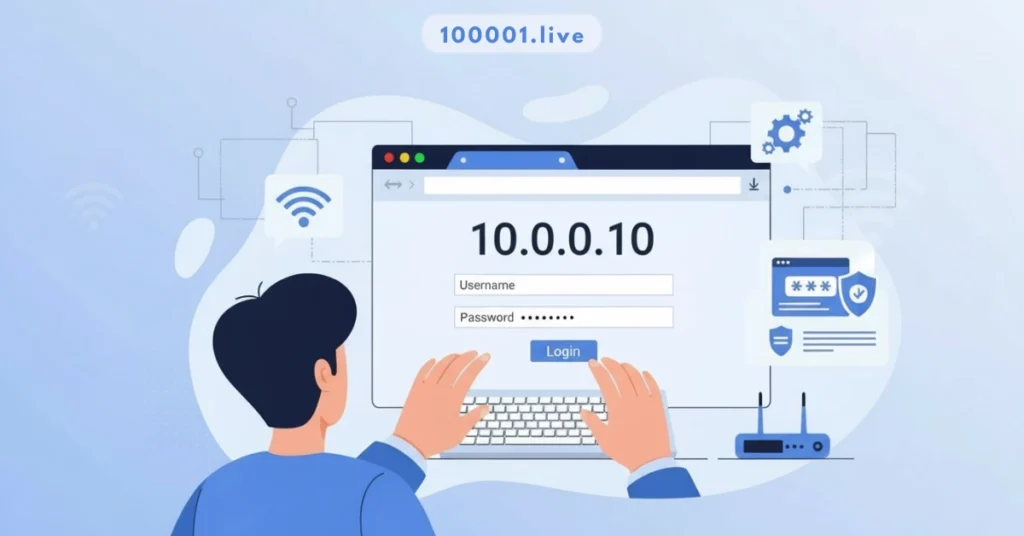
Step 3: Enter the IP Address in the Address Bar
In the address bar (not the search bar), type:
http://192.168.0.1

Then press Enter.
Tips:
- Make sure you’re not typing 192.168.o.1 with a letter.
- Don’t add .com, .net, etc.
If your browser redirects to a search page, retype the URL carefully in the address bar.
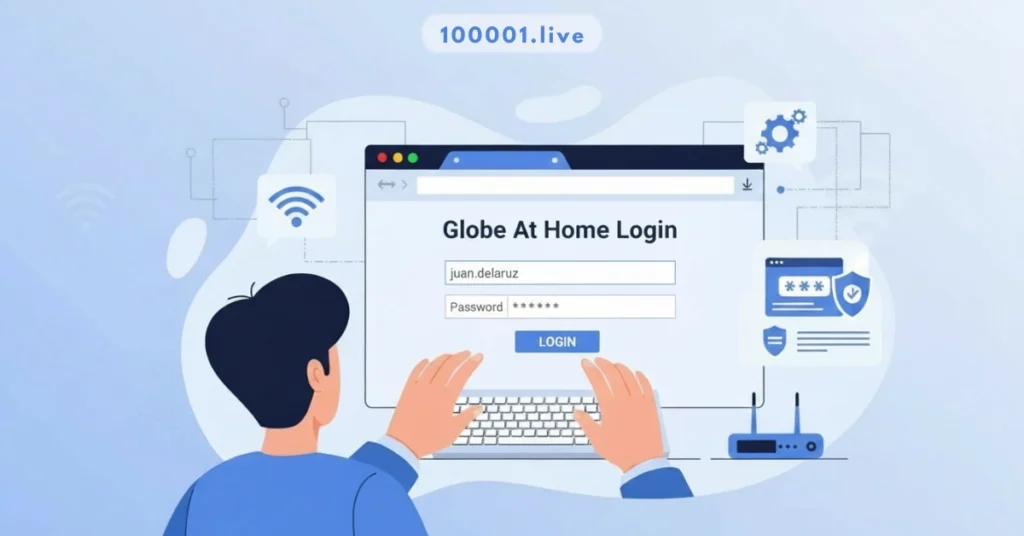
Step 4: Enter Router Login Username and Password
If the IP address is correct and your device is connected, you’ll see a login page for your router.
Typical default login credentials are often:
- Username: admin
- Password: admin
or
- Username: admin
- Password: password
Or sometimes:
- Username: blank
Password: admin
If those don’t work, check:
- The sticker on the back/bottom of your router
- The router manual or box
If you changed the password before and forgot it, you may need to reset the router to factory settings (we’ll cover this later).
Step 5: Access the Admin Dashboard
Once you enter the correct login details, you’ll be taken to the router admin dashboard. This is where you can:
- View and change Wi-Fi settings
- Configure LAN/DHCP
- Manage connected devices
- Set up guest networks.
- Change admin password
- Update firmware
- Set up parental controls, firewall rules, and more.e
From here, you’re in complete control of how your network behaves.
Why 192.168.0.1 Is Special
To understand 192.168.0.1 properly, you need to know the difference between private and public IP addresses.
Public IP Address
- Assigned by your Internet Service Provider (ISP).
- Unique across the entire internet.
- This is the address that websites see when you visit them.
Private IP Address
- Used only inside local networks (home, office, school).
- Not routable on the public internet.
- Defined by standards from IANA (Internet Assigned Numbers Authority).
- 192.168.0.1 belongs to one of these private ranges.
Common private IP address ranges include:
- 10.0.0.0 – 10.255.255.255
- 172.16.0.0 – 172.31.255.255
- 192.168.0.0 – 192.168.255.255
Your router sits in the middle:
- On the internet side, it has a public IP address from your ISP.
On the local side, it has a private IP address, such as 192.168.0.1, and assigns other private IPs to your devices via DHCP.
Which Routers Use 192.168.0.1 as a Default Gateway?
Many popular router brands and specific models ship with 192.168.0.1 configured as the default gateway.
Common examples include:
- TP-Link
- D-Link
- NETGEAR
- Tenda
- Some ISP-branded modems and Wi-Fi routers
However, not all models from these brands use 192.168.0.1. Some use:
- 192.168.1.1
- 192.168.100.1
- 10.0.0.1
- Or a custom IP defined by your ISP
192.168.0.1 vs 192.168.o.1 – Common Typing Mistakes
One classic mistake people make is typing:
192.168.o.1 (with the letter "o") instead of
192.168.0.1 (with the number zero)
IP addresses contain only numbers and dots, no letters.
Don't add www in front (e.g., www.192.168.0.1 is wrong).
In most cases, you don't need https:// either — just type:
http://192.168.0.1
Show a search result page instead of router login, or
Show a "This site can't be reached" error.
Default Login Credentials for 192.168.0.1
Different router brands and models ship with varying default credentials, but a few combinations appear again and again.
Here are some of the most common:
Username | Password |
admin | admin |
admin | password |
admin | (blank) |
(blank) | admin |
user | user |
Important: If you log in with the default credentials, your router is not yet secure. You should always change the admin password after the first login.
Where to Find the Correct Default Login for Your Router
If none of the standard combos work:
- Look at the label on the bottom/back of your router
- Look into the quick start guide or manual.
- Search online for your router model + default login.
- If your ISP provided the router, the default may be customized (often printed on the device)
What You Can Do Inside the 192.168.0.1 Admin Panel
Once you’re in, you get access to a lot of powerful settings. Here’s what most people use it for.
1. Change Wi-Fi Name (SSID)
- Set a recognizable name for your network (e.g., “Home_WiFi_5G”).
- Avoid using personal info in the name (like full name or phone number).
2. Change Wi-Fi Password
- Set a strong, unique password to prevent neighbors or strangers from using your internet.
- We’ll walk through detailed steps in the next section.
3. Change Wi-Fi Security Type
- Choose WPA2-PSK or WPA3 (if supported) for maximum security.
- Avoid outdated options like WEP.
4. Create a Guest Network
- Provide internet access to guests without giving them access to your main devices.
- Useful for visitors, Airbnb guests, or customers in a small office.
5. Manage Connected Devices
- See which devices are connected to your Wi-Fi.
- Block unknown or suspicious devices.
6. Parental Controls
- Set schedules for internet usage.
- Block adult or harmful content categories for specific devices.
7. MAC Address Filtering
- Allow only specific devices (by MAC address) to connect.
- Adds another layer of access control (though not bulletproof on its own).
8. Port Forwarding & Advanced Settings
- Set port forwarding rules for online games, servers, CCTV, etc.
- Set up DMZ (if needed) and other advanced options.
9. Firmware Updates
- Check if a newer firmware version is available.
- Updating can fix bugs, improve security, and sometimes boost performance.
10. Change Admin Username/Password
- Protect your router’s login page itself.
- This is different from your Wi-Fi password — it’s for the admin dashboard.
How to Change Your Wi-Fi Network Name (SSID) via 192.168.0.1
Changing your Wi-Fi name makes it easier to recognize your network and can also be part of cleaning up your setup.
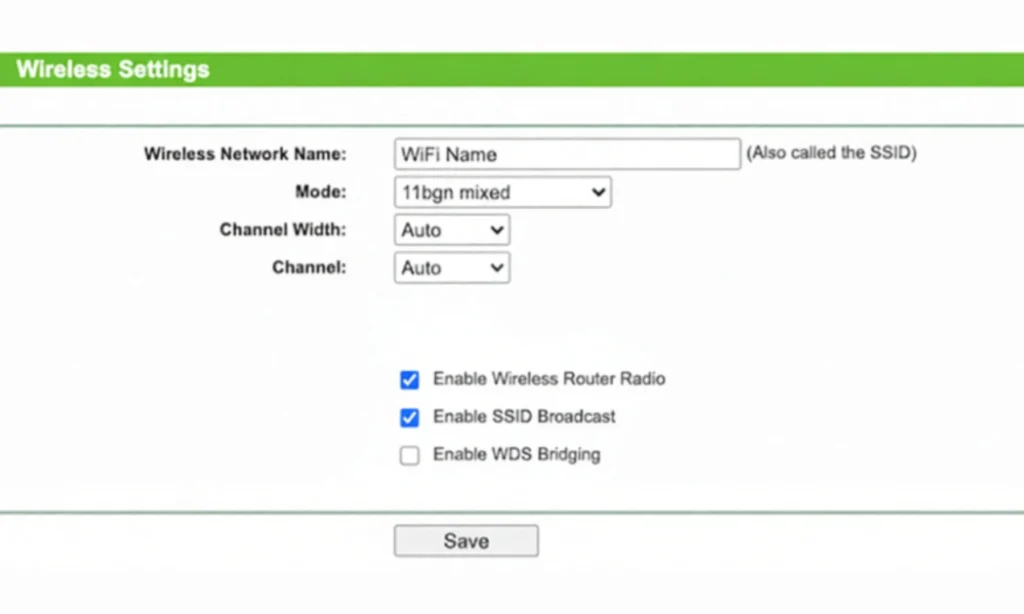
Step-by-Step: Change SSID
- Log in to the router admin panel at http://192.168.0.1.
- Enter your username & password.
- Look for a menu like:
- Wireless, Wireless Settings, or Wi-Fi Settings.
- Wireless, Wireless Settings, or Wi-Fi Settings.
- Find the field labeled something like:
- SSID, Network Name, or Wireless Network Name.
- SSID, Network Name, or Wireless Network Name.
- Enter your new Wi-Fi name.
- Click Save or Apply.
After you save:
- The router may reboot or the Wi-Fi may restart for a moment.
- Your devices will see the new network name and you’ll need to reconnect to it (using the same password if you didn’t change it).
Tips for Choosing a Wi-Fi Name
- Make it easy to identify, especially if there are many networks around.
- Avoid using your real name, address, or personal info.
- You can be creative (e.g., “NotYourWiFi”, “PingPalace”, etc.), as long as you remember it.
How to Change Your Wi-Fi Password Using 192.168.0.1
Changing your Wi-Fi password is one of the most important steps in securing your home network. If you’re still using the default password printed on the router, you should change it immediately.
Step-by-Step: Change Wi-Fi Password
- Connect to your router’s network (Wi-Fi or Ethernet).
Open your browser and go to:
http://192.168.0.1
- Log in with your router admin username and password.
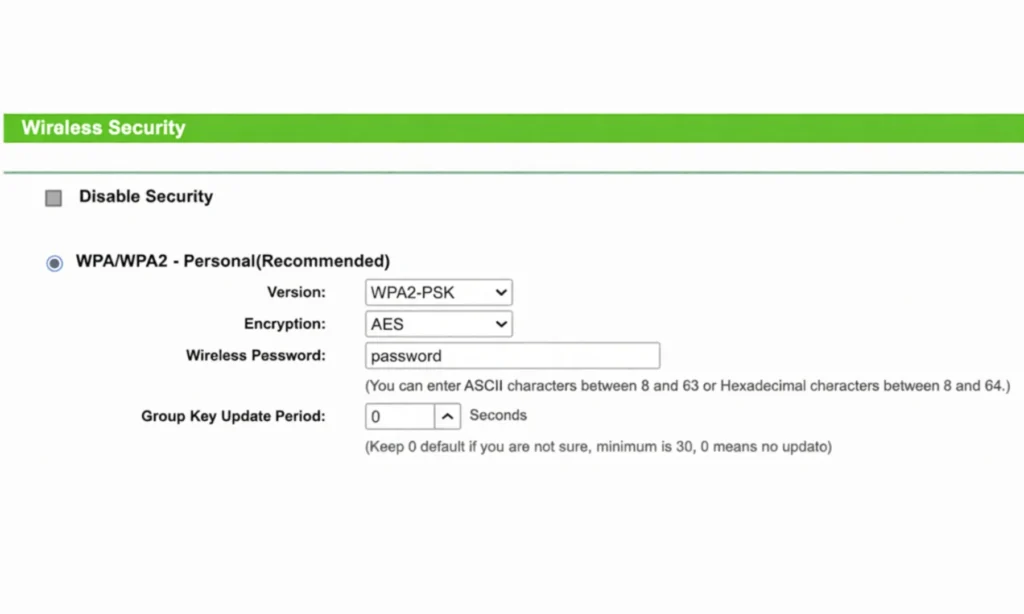
- Go to the Wireless, Wireless Security, or Wi-Fi section.
- Look for a field labeled:
- Wireless Password
- Passphrase
- Pre-Shared Key (PSK)
- Wireless Password
- Enter your new Wi-Fi password.
- Make sure the Security Type is set to WPA2-PSK or WPA3-PSK if available.
- Click Save or Apply.
Your router may reboot or the Wi-Fi network may quickly restart. After that:
- All previously connected devices will be disconnected.
- You’ll need to reconnect each device using the new Wi-Fi password.
How to Choose a Strong Wi-Fi Password
- At least 8–12 characters (more is better).
- Use a mix of:
- Uppercase letters (A–Z)
- Lowercase letters (a–z)
- Numbers (0–9)
- Special characters (!, @, #, $, etc.)
- Uppercase letters (A–Z)
- Avoid:
- Simple words like password, 12345678, qwerty
- Your name, birthday, phone number, or street name
- Simple words like password, 12345678, qwerty
Example of a strong yet memorable password structure:
- Take a phrase: I love my WiFi router 2025!
- Turn it into: ILmwR@2025!
Easy for you to remember, hard for others to guess.
Why You Might Not Be Able to Access 192.168.0.1
Even though accessing http://192.168.0.1 is supposed to be simple, many users run into problems. The page might fail to load, show an error like “This site can’t be reached”, or redirect to a search engine.
Below are the most common reasons — and the exact fixes.
1. You Typed the IP Address Wrong
One of the most common mistakes is typing:
- 192.168.o.1 (letter “o” instead of zero)
- 192.168.0.1.com
- www.192.168.0.1
- https://192.168.0.1
None of these work.
Fix:
Type it exactly as:
http://192.168.0.1
Or enter 192.168.0.1 directly into the browser’s address bar (not search bar).
2. Your Device Is NOT Connected to the Router’s Network
If your device is connected to:
- Mobile data
- Another Wi-Fi network
- A neighbor’s router
- A public hotspot
- A VPN
you will not reach 192.168.0.1 of your router.
Fix:
Connect to:
Your router’s Wi-Fi network
or Use an Ethernet cable plugged into the router’s LAN port
If using mobile, turn off mobile data and disconnect VPN.
3. Your Router Uses a Different Default Gateway
192.168.0.1 is common, but your router may use:
192.168.88.1 (some TP-Link Aginet devices)
Fix: Find your actual default gateway
Instructions per device are provided in the next section.
4. Browser Cache Issues
Sometimes your browser loads a cached error page instead of the actual router dashboard.
Fix:
- Clear browser cache and cookies
- Open incognito/private mode
Try another browser like Chrome, Edge, or Firefox
5. Router Firmware Has Crashed or Is Frozen
Routers can slow down, freeze, or stop responding.
Fix:
Restart the router.
- Turn it off
- Wait 10 seconds
- Turn it back on
If still no access:
Try a factory reset (explained below).
6. Router Hardware or Cable Problems
Faulty power supplies, broken LAN cables, or loose connections can cause access errors.
Fix:
- Check the power adapter
- Replug the Ethernet cable
- Try another LAN port
- Ensure WAN cable is firmly connected
How to Find Your Router’s Correct IP Address
If 192.168.0.1 isn’t opening the admin page, you should verify whether it is the right gateway.
Here are the steps for every major device.
1. Windows (All Versions)
Steps:
- Press Windows + R
- Type:
cmd
- Press Enter
- In Command Prompt, type:
ipconfig
- Look for:
Default Gateway . . . . . : 192.168.0.1
Whatever is shown next to Default Gateway is your router’s login IP.
2. macOS (MacBook, iMac)
Steps:
- Click the Apple icon
- Go to System Preferences
- Choose Network
- Select Wi-Fi or Ethernet
- Click Advanced
- Go to TCP/IP tab
- Look for Router — that’s your gateway IP.
3. Linux (Ubuntu, Mint, etc.)
Steps:
Open Terminal and type:
ip route | grep default
You’ll see:
Default via 192.168.0.1 …
4. Android (Samsung, Pixel, etc.)
Steps vary slightly by brand, but generally:
- Open Settings
- Go to Network & Internet
- Select Wi-Fi
- Tap your connected Wi-Fi network
- Look for Advanced or Details
- Scroll to Gateway — this is your router IP.
5. iPhone / iPad (iOS)
- Open Settings
- Tap Wi-Fi
- Tap the i (info) icon beside your network
- Look for Router — that’s the gateway.
6. Chromebook (Chrome OS)
- Click the clock area (bottom right)
- Tap Wi-Fi
- Open Network settings
- Click your Wi-Fi
- Under the Network tab, find Gateway.
Brand-Specific Guides Using 192.168.0.1
Different router brands have different interface styles and login methods. Here are the most common ones.
TP-Link Routers (via 192.168.0.1)
TP-Link is one of the most widely used Wi-Fi router brands globally. They frequently use:
- 192.168.0.1
- 192.168.1.1
- tplinkwifi.net
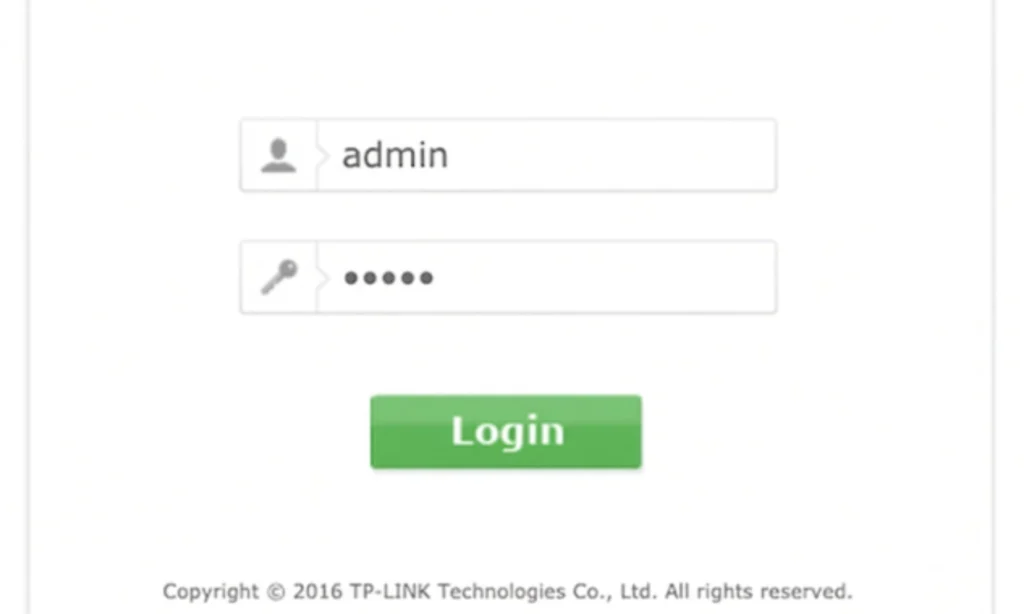
Default TP-Link Login Credentials
- Username: admin
- Password: admin
(Some ISP-provided TP-Link routers use unique printed passwords.)
How to Access TP-Link Admin Panel
- Connect to TP-Link Wi-Fi
- Open a browser and enter:
http://192.168.0.1
or
http://tplinkwifi.net
- Enter the username/password.
Access dashboard
Managing Your TP-Link Router
Inside the admin panel, you can:
- Change SSID and password
- Create guest networks
- Update firmware
- Manage parental controls
- Set bandwidth controls (quality of service)
Configure wireless mode (2.4GHz/5GHz)
TP-Link App Setup (Tether App)
For easier management:
- Install TP-Link Tether App (Android/iOS)
- Login with your TP-Link ID
- App automatically detects router
Manage Wi-Fi name, password, parental controls, and more
D-Link Routers (via 192.168.0.1)
Many D-Link models use 192.168.0.1 as the default login.
Default D-Link Login Credentials
- Username: admin
- Password: (blank) OR admin
Key D-Link Settings Available
- Wireless settings (2.4GHz/5GHz)
- Guest Wi-Fi
- MAC filtering
- Firewall settings
- QoS control
- Firmware updates
Virtual Server / Port Forwarding
NETGEAR Routers (via 192.168.0.1)
NETGEAR routers often use:
- 192.168.0.1
- 192.168.1.1
- routerlogin.net
Default NETGEAR Login Credentials
- Username: admin
- Password: password
NETGEAR provides a simplified GUI with:
- Home dashboard
- Wi-Fi settings
- Attached devices list
- Traffic meter
- Parental controls
Tenda Routers (via 192.168.0.1)
Tenda is a popular budget-friendly router brand.
Default Tenda Login Credentials
- Username: admin
- Password: admin
Managing Tenda Router via 192.168.0.1
Common settings you can modify:
- SSID & Wi-Fi password
- Wi-Fi channel selection
- WDS (Wireless Repeater Mode)
- Parental controls
- Security mode
- LAN & DHCP settings
WAN configuration
How to Reset Your Router (Factory Reset Guide)
If you’ve forgotten your login password or the router is malfunctioning, the ultimate fix is a factory reset.
How to Reset:
- Find the RESET button (usually small and recessed).
- Use a toothpick or pin.
- Press and hold 10–15 seconds.
- Wait for lights to blink.
Once reset:
- Router returns to default settings
- Default username & password are restored
You must set up your Wi-Fi again
How to Change the Router’s Default IP Address (Like 192.168.0.1)
Some users prefer to change their router IP for:
- Better security
- Avoiding conflicts in multi-router setups
- Using custom network configurations
Steps (General)
- Log in to the router admin
- Go to LAN Settings or Network Settings
- Find Router IP Address
- Change it to something like:
or
10.0.50.1
- Save changes
- Router reboots
Login again using the new IP
Advanced Router Settings You Can Access via 192.168.0.1
1. DHCP Settings
Control how IPs are assigned to devices.
2. IP Reservation
Give specific devices a fixed IP.
3. Port Forwarding
Needed for:
- Gaming servers
- CCTV
- NAS
- Remote access
4. DMZ Setup
Expose one device to the internet (use carefully).
5. Quality of service (Quality of Service)
Prioritize essential devices, such as a gaming console or a work laptop.
6. Firewall Settings
Block suspicious incoming or outgoing traffic.
7. Wireless Mode
Choose:
- 802.11b
- 802.11g
- 802.11n
- 802.11ac
802.11ax (Wi-Fi 6)
Router security Best Practices
Securing your home Wi-Fi is essential. Here’s what experts recommend:
1. Change the Default Admin Password
Default login credentials are widely known online.
2. Use WPA2 or WPA3 security
WEP is outdated and insecure.
3. Disable WPS
WPS is vulnerable to brute-force attacks.
4. Update Router Firmware Regularly
Fixes security bugs and improves performance.
5. Create a Separate Guest Network
Protects your main devices from guests.
6. Turn Off Remote Management (Unless Needed)
Prevents outside access to your admin panel.
Frequently Asked Questions
What is 192.168.0.1?
A default private IP address is used to access router admin settings.
Why is 192.168.o.1 not working?
Because IP addresses use numbers only — not letters.
What if default admin credentials don’t work?
Try other brand-specific defaults or reset your router.
Why can’t I access the login page?
Causes include wrong IP, not connected to router, browser cache, or router malfunction.
How do I secure my router?
Change Wi-Fi password, admin password, update firmware, and use WPA2/WPA3.